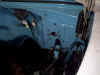
Step 1- Before
disconnecting anything, degrease and remove any dirt, grease etc from
threaded areas. This makes the disassembly easier and prevents debris from
entering the system. |
|
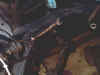
| Step 2- Remove old master
cylinder and prepare the area. Be sure to remove the "rod" from the pedal,
and save for use later. Now would be a good time to detail the firewall if
the motor is out. |
 |
| Step 3- Attach the m/c to
firewall for test fitting of the new lines. It will be removed later, so no
need to tighten too tight. |
|
| Step 4- Disconnect the
line going to the rear brakes at Tee on passenger side. Install the 3/16
plug in the Tee. |
|
| Step 5- Using the 3/16
unions, run 3/16 line from the fitting that was removed from the Tee, along
frame and crossmember, towards the m/c. Using a tubing bender to avoid
kinking the soft steel line. |

|
| Step 6- Terminate the end
of the line to one of the ports on the m/c. Neatly coil the tubing to allow
for the extra length of tubing. |
 |
| Step 7- Replace original
line from stock master cyl to the Tee on drivers side with 1/4 X 30" steel
line. |
Step 8- Remove m/c and
bench bleed per instructions. |
| Step 9- Re-install the
m/c and pedal "rod" Securely attach front and rear lines. Adjust the pedal
for 1/2 to 3/4 inch free travel and tighten lock nut. Check all other
fitting connections. |
Step 10- Adjust the
brakes and bleed system. Check for leaks. Don't forget to test drive and
check proper pedal operation before hitting the freeway. |


